Guide: Uploading Files from Customize to Your Streamable Remote OBS
Customize your stream with images and videos by uploading files to Customize in your Streamable Dashboard and adding them to your OBS scene.
Enhance your stream with custom images and videos
In this guide, we'll walk you through the simple process of adding images, videos, and other files to your Cloud OBS stream using Customize in the Streamable Dashboard.
Step 1:Open Customize
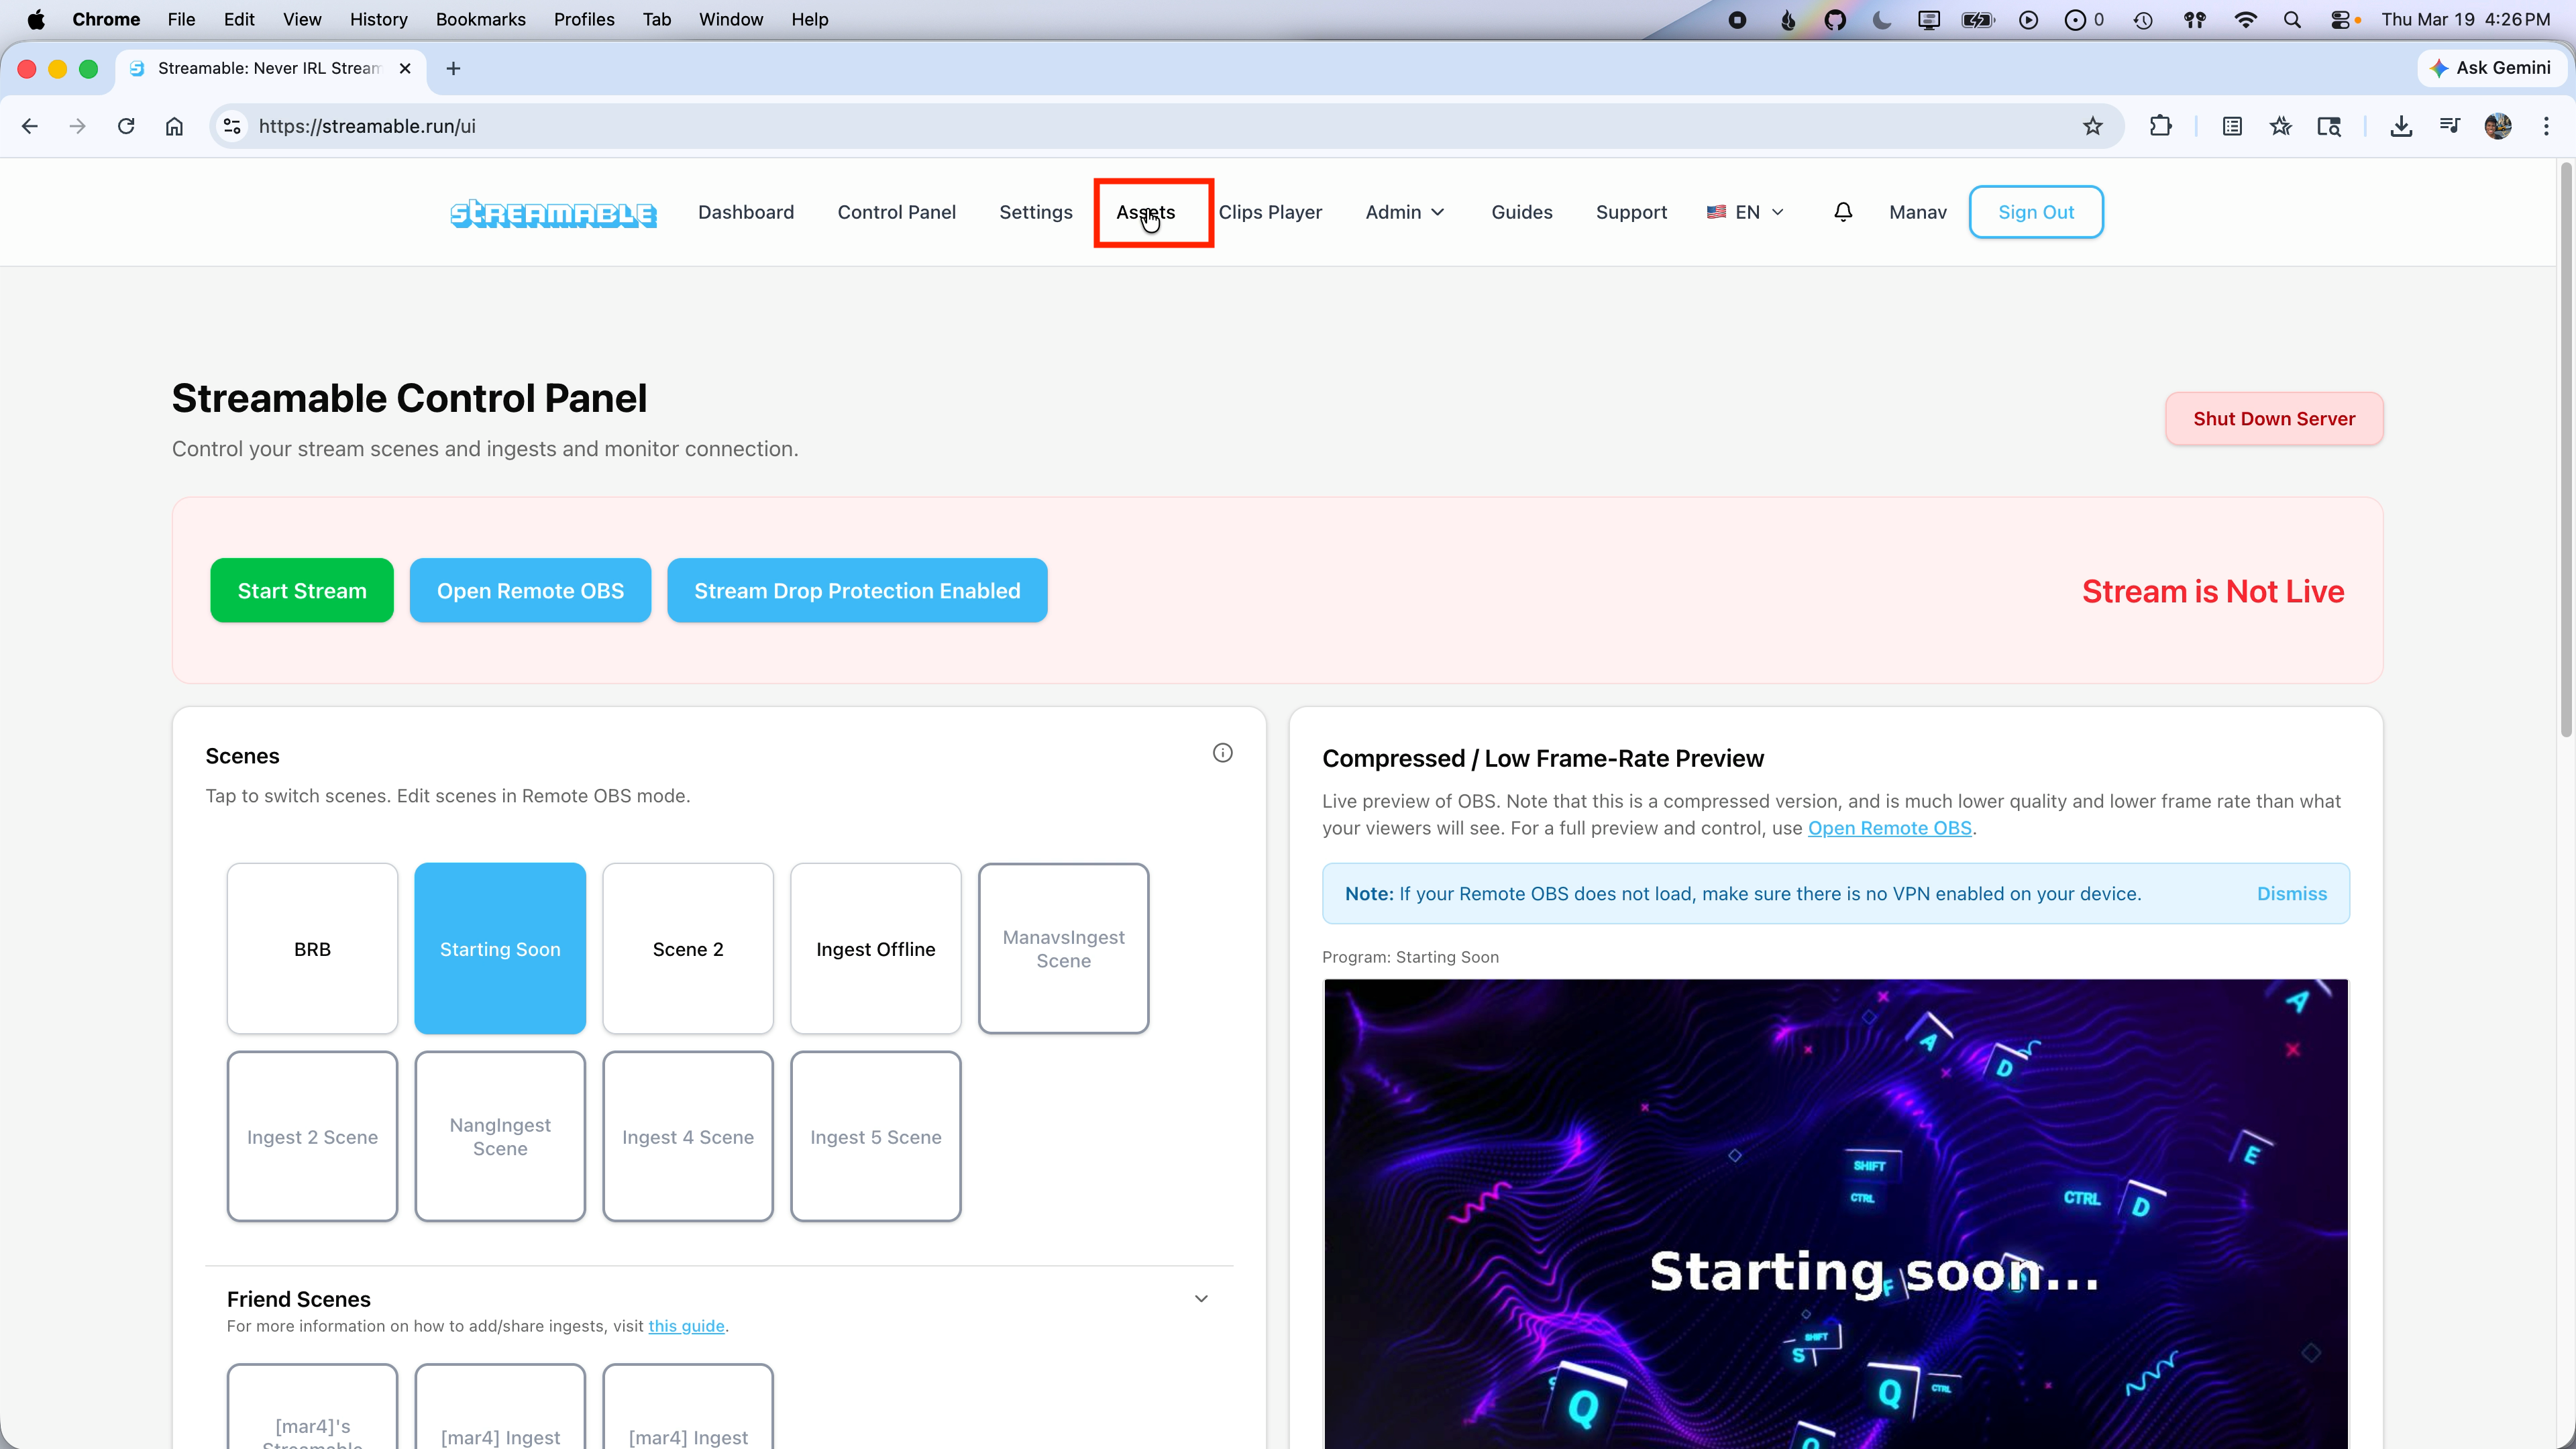
Go to Customize in your Streamable Dashboard.
This is where you'll manage all your banners, intros, and overlays.
Step 2:Upload Your Files
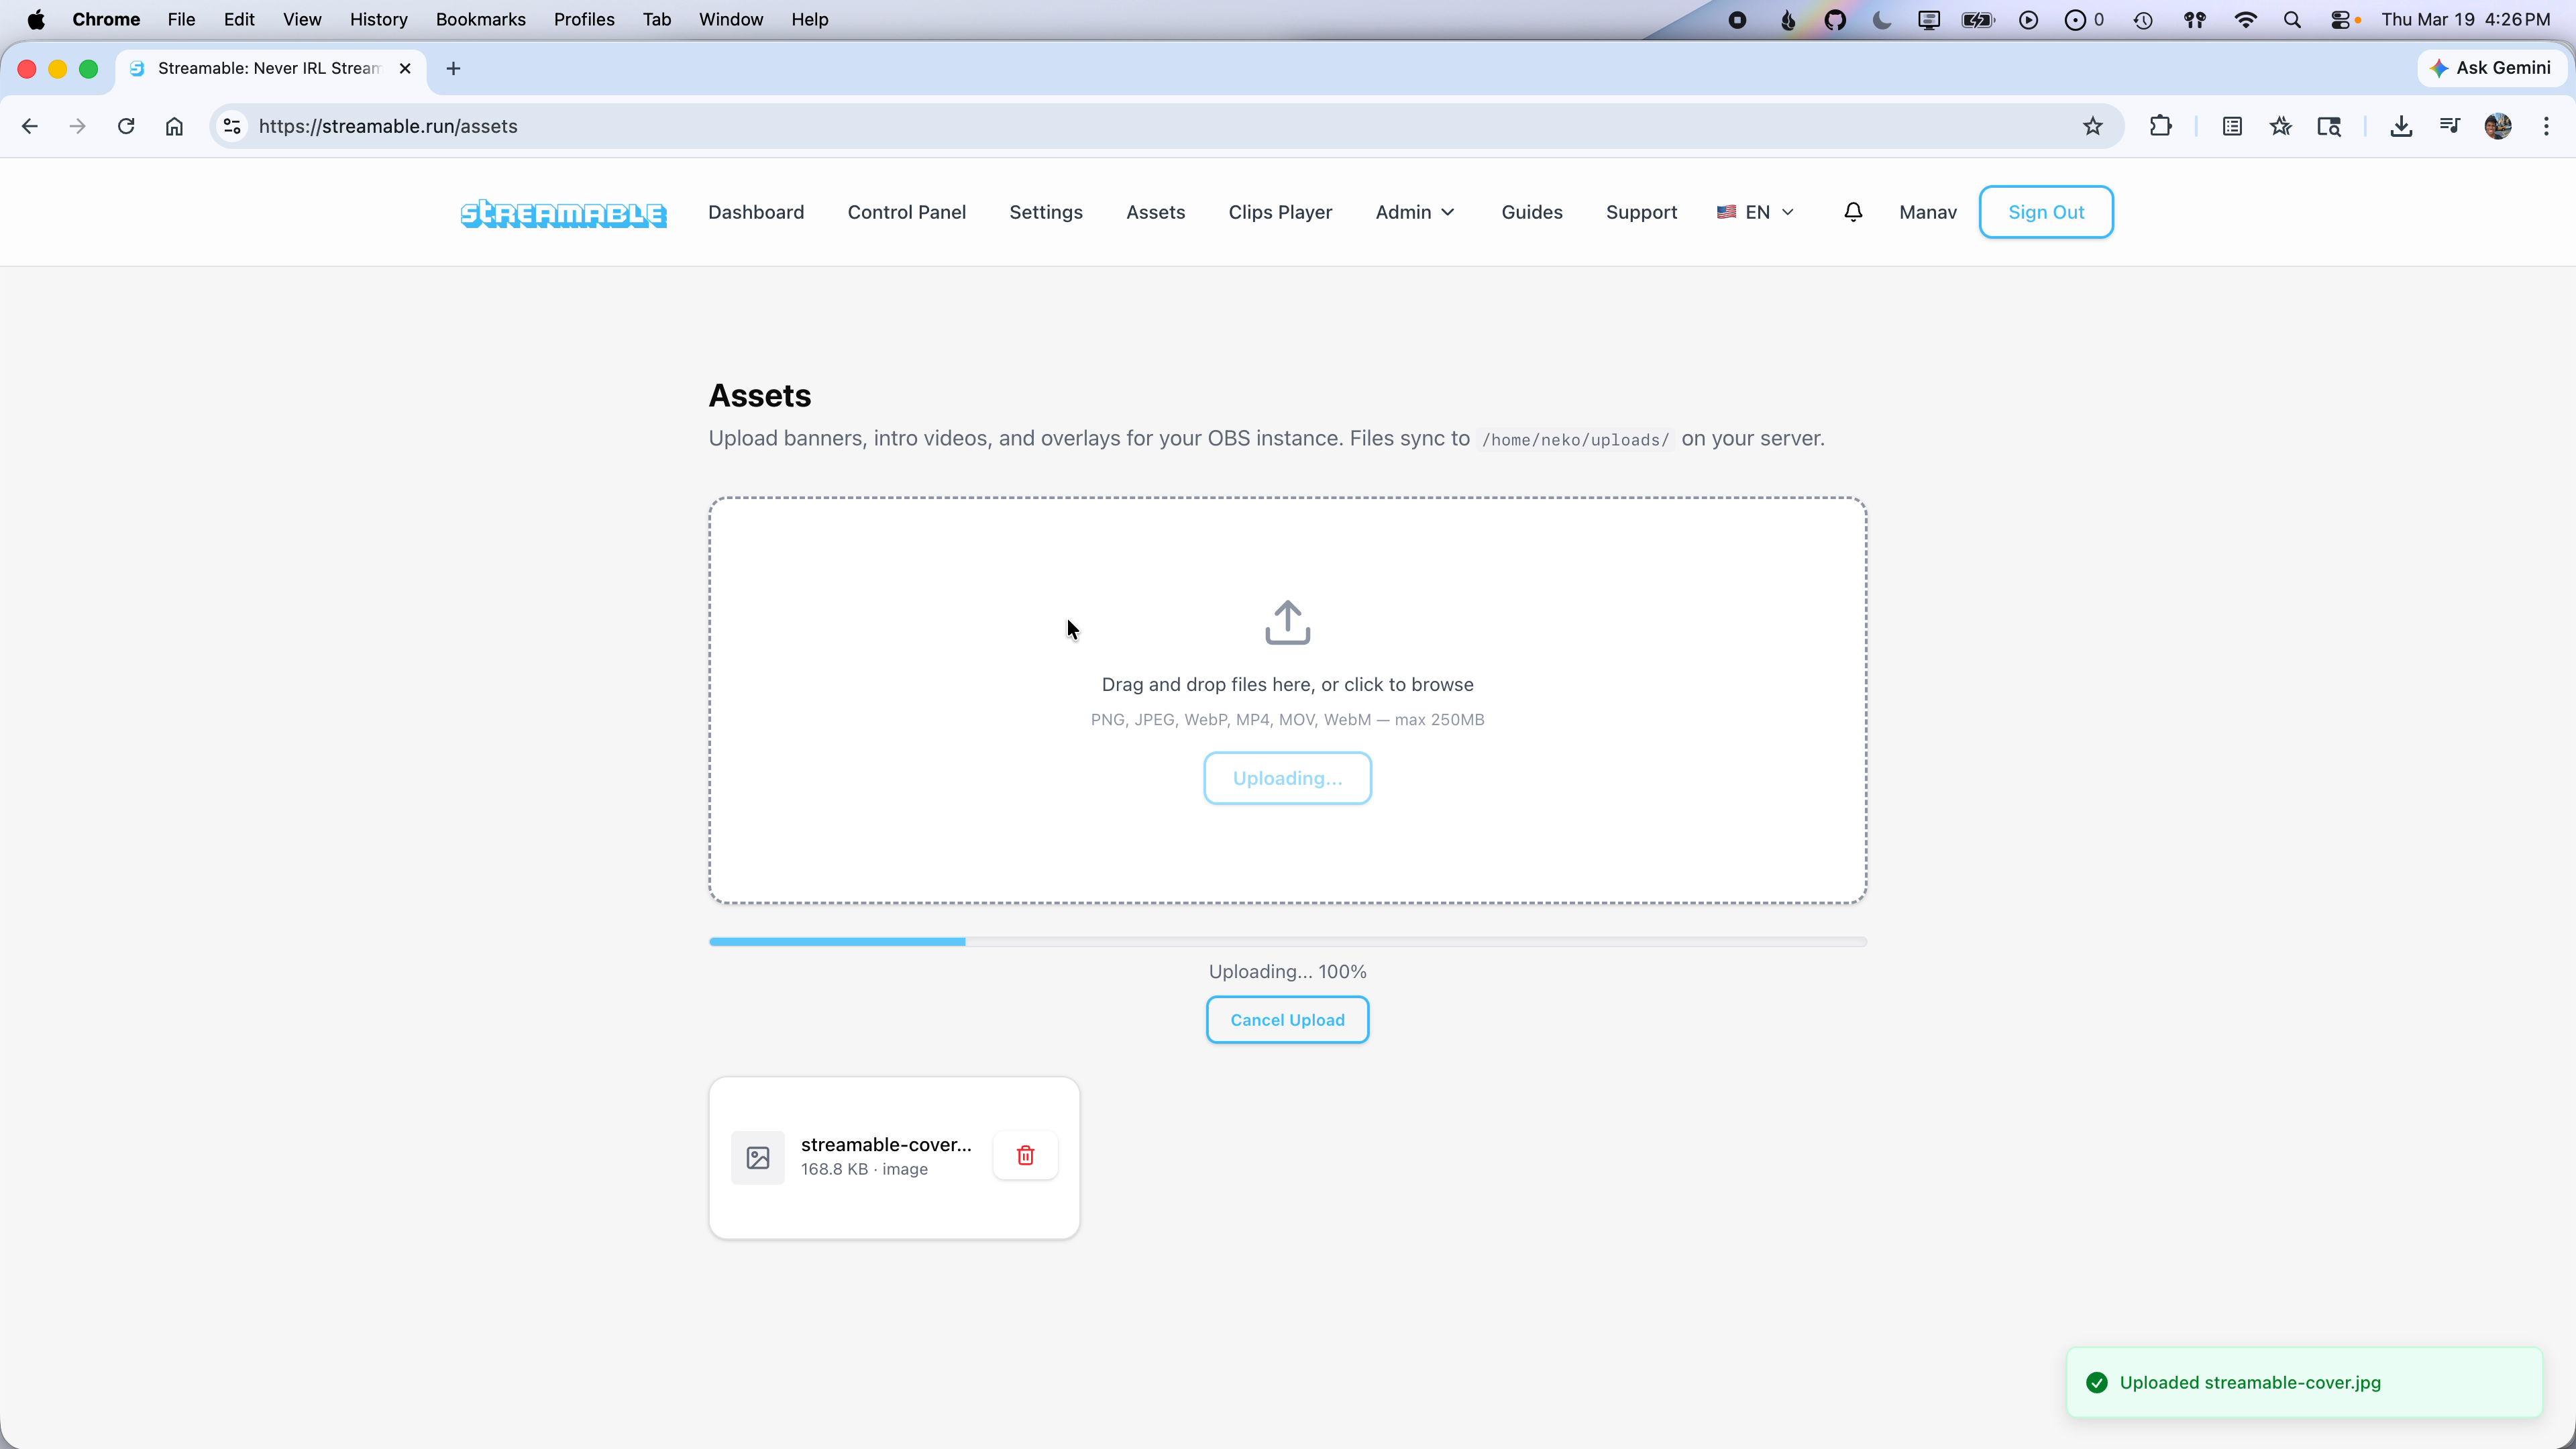
Click the Choose File button to select the image or video you want to upload.
You can also drag and drop files directly into the upload area. Your files will be saved on the server and synced to your OBS instance.
Step 3:Open Remote OBS
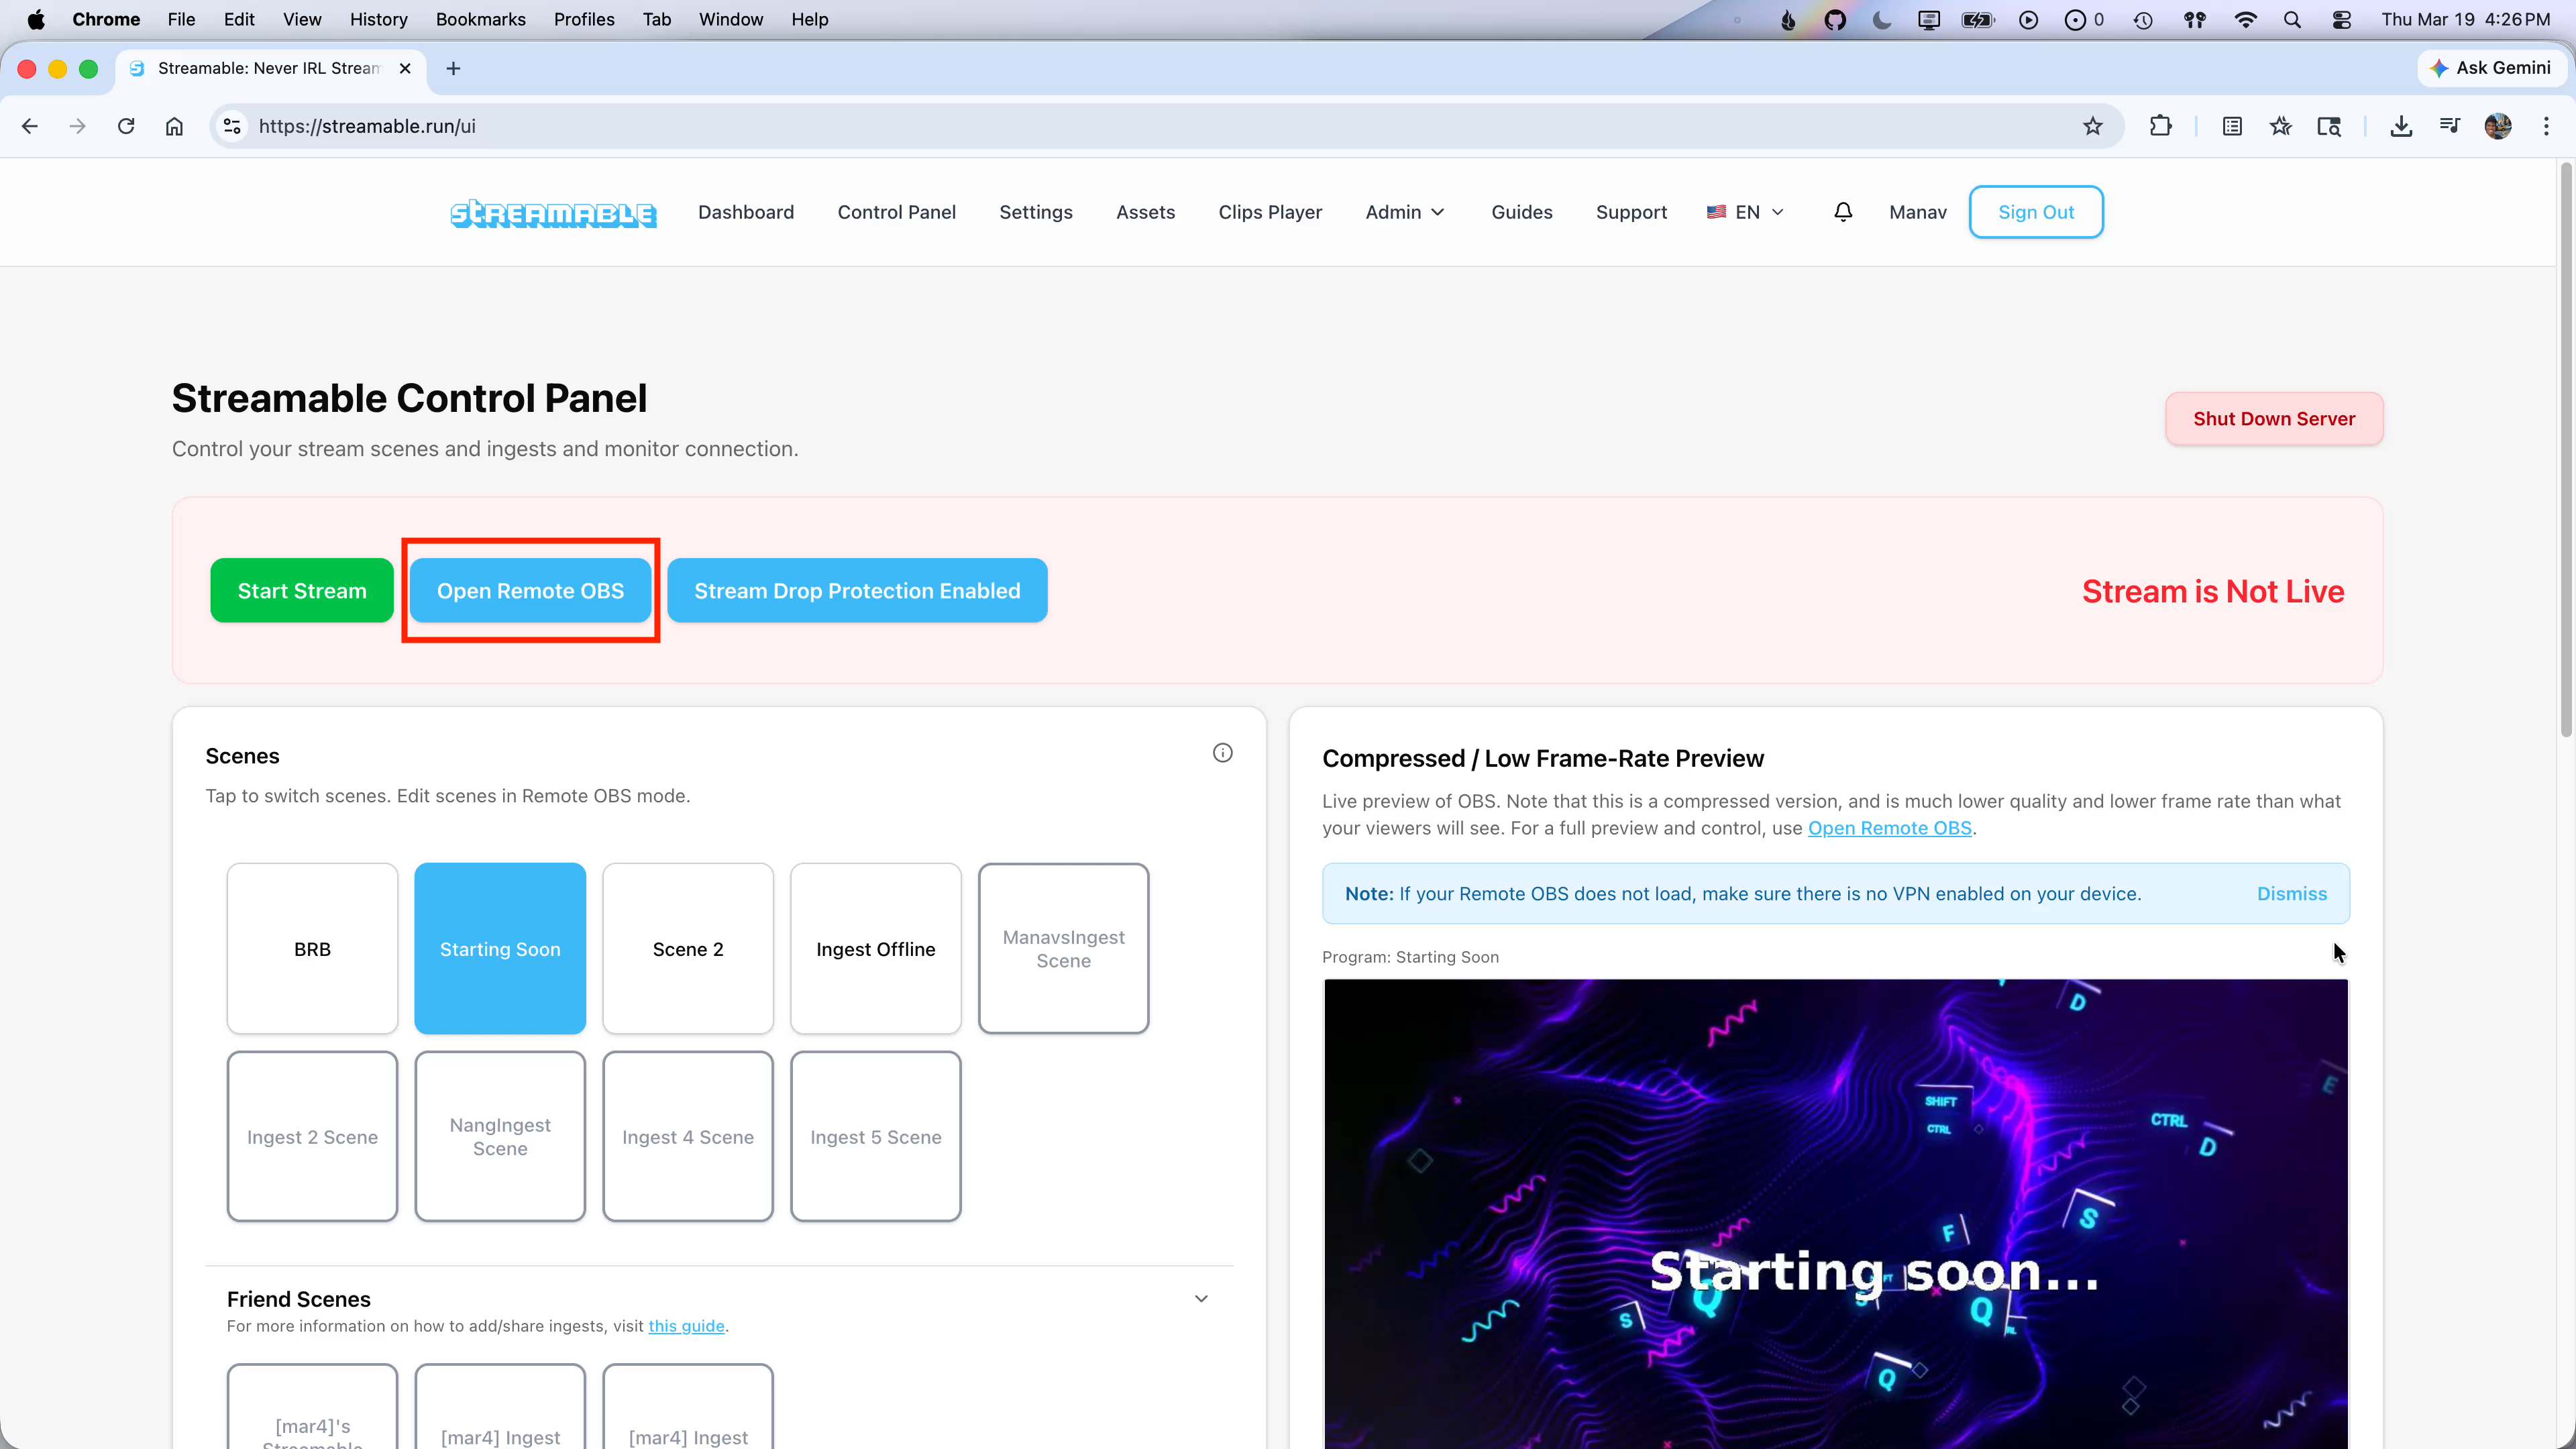
Once your files are uploaded, go back to the Dashboard and click Open Remote OBS.
This will open your OBS interface in a new tab.
Step 4:Add Your Files as Sources in OBS
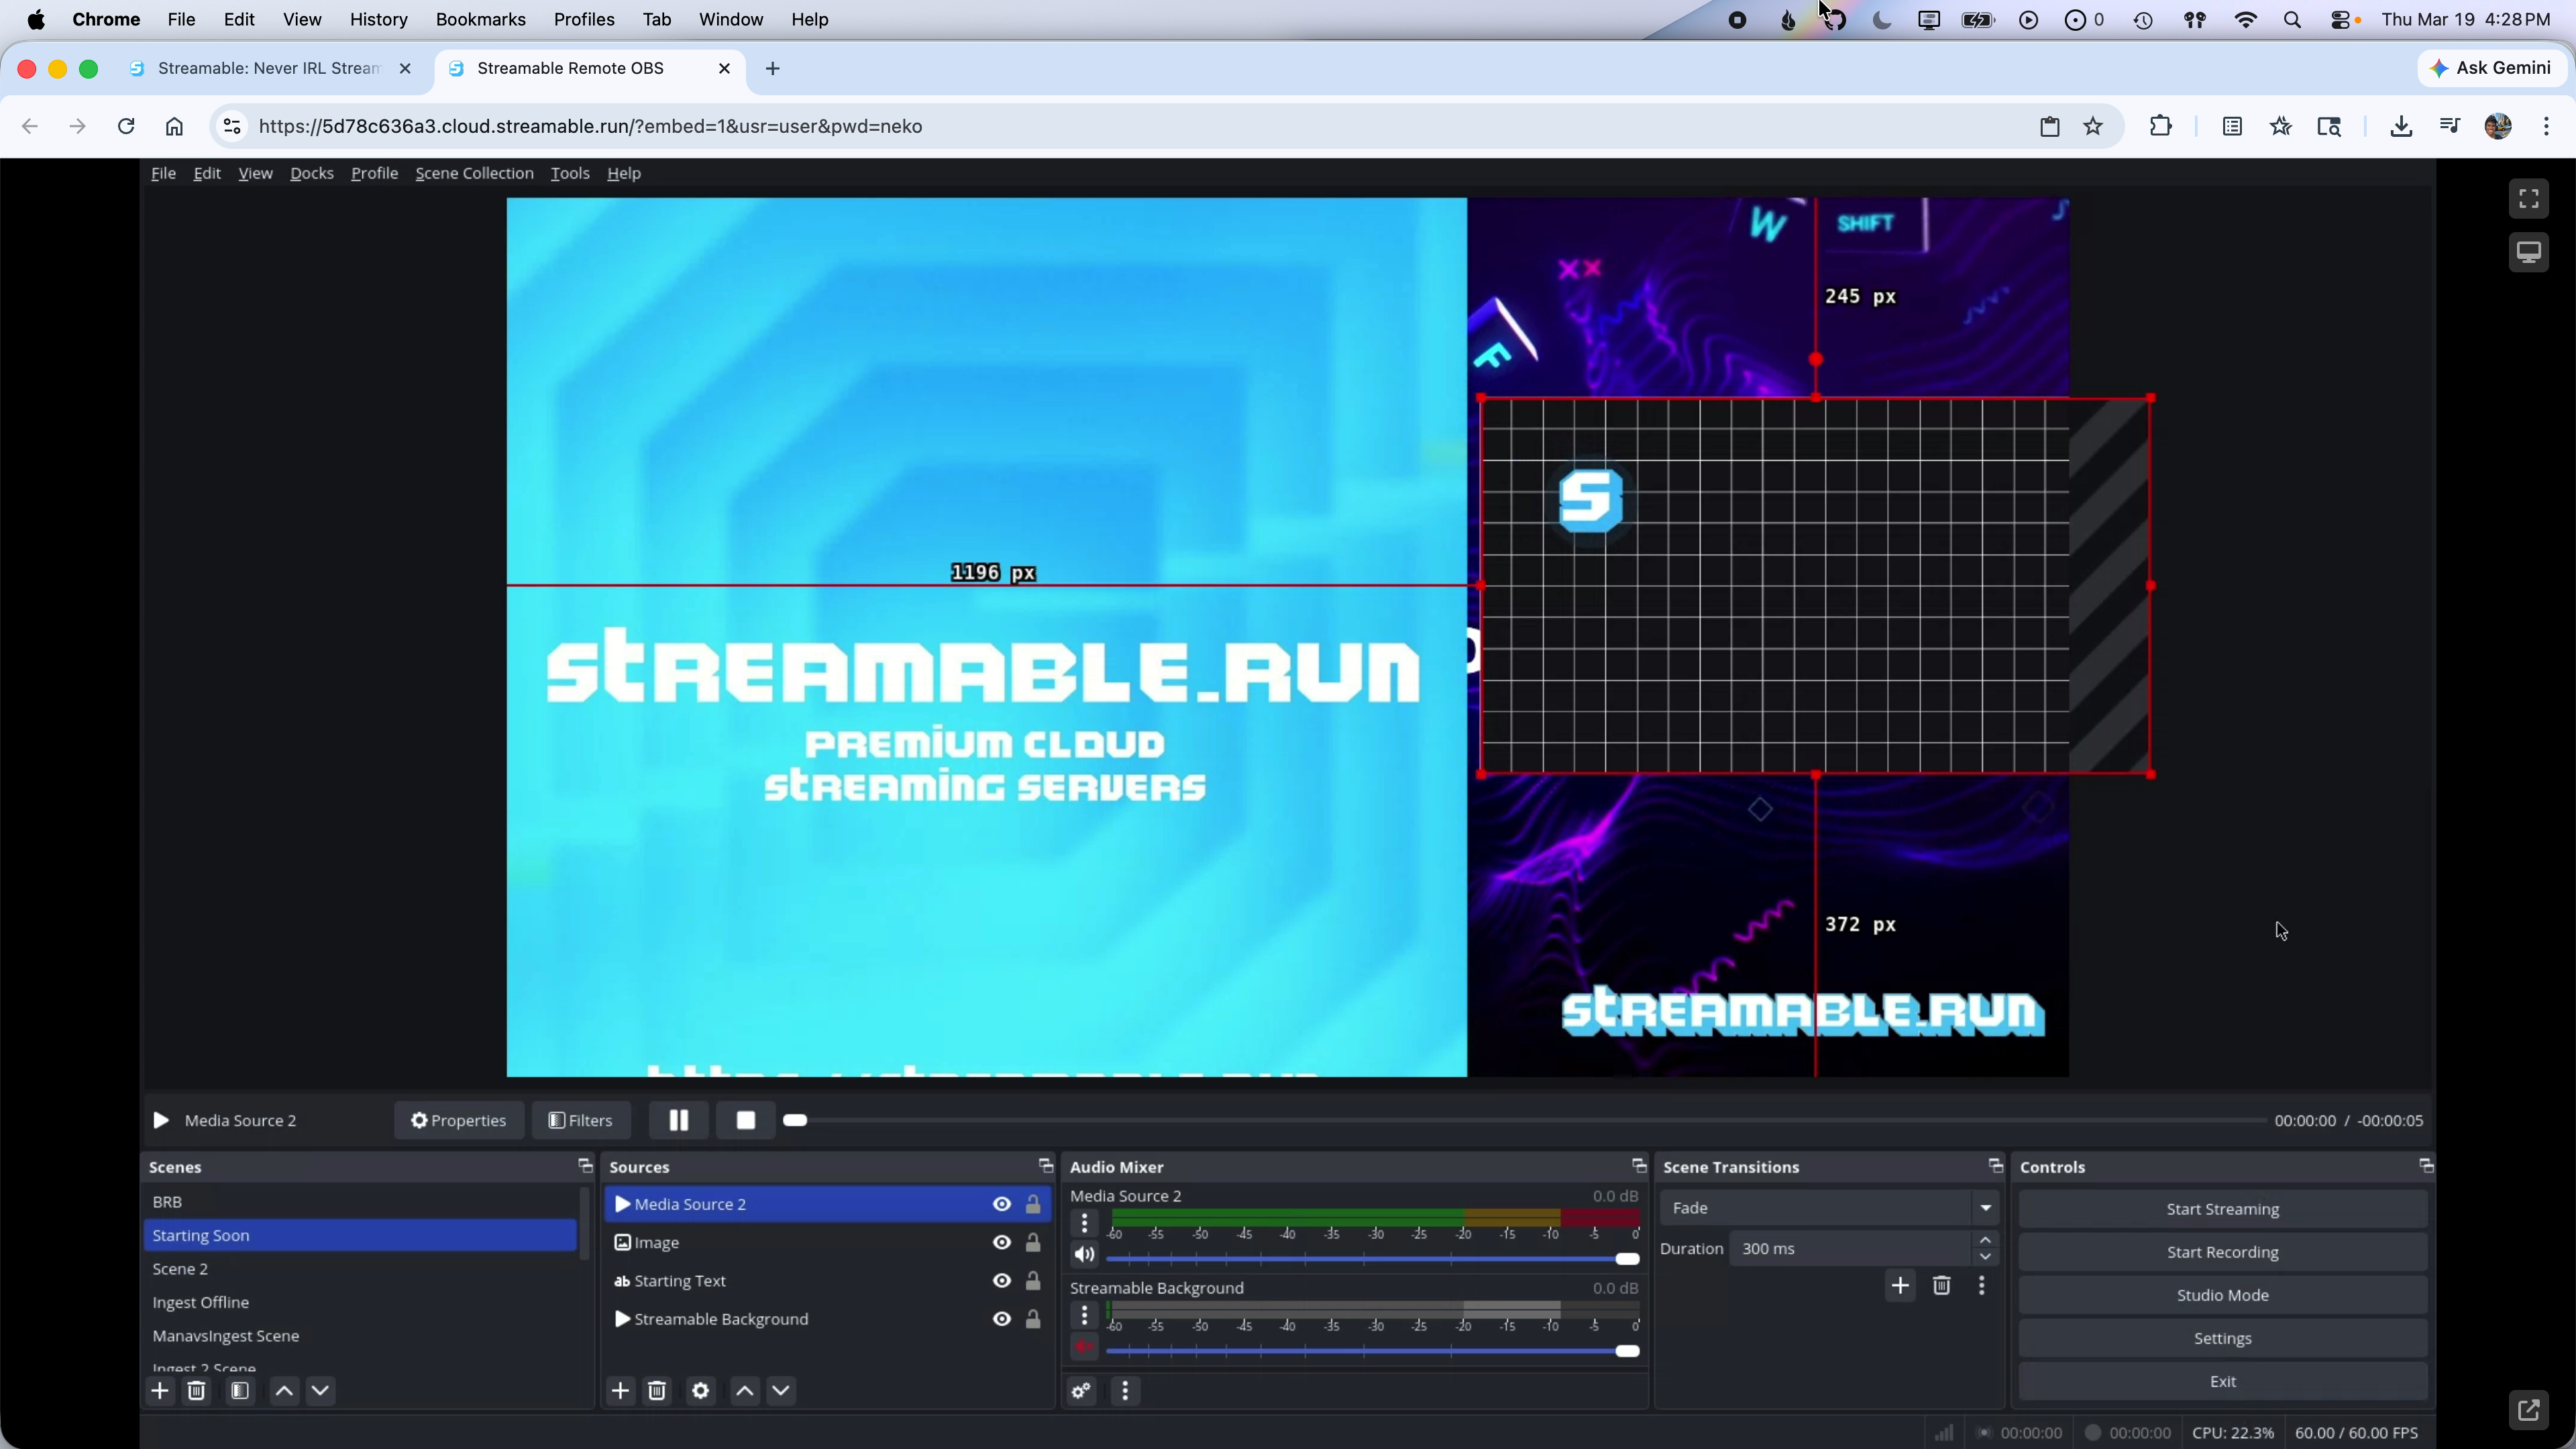
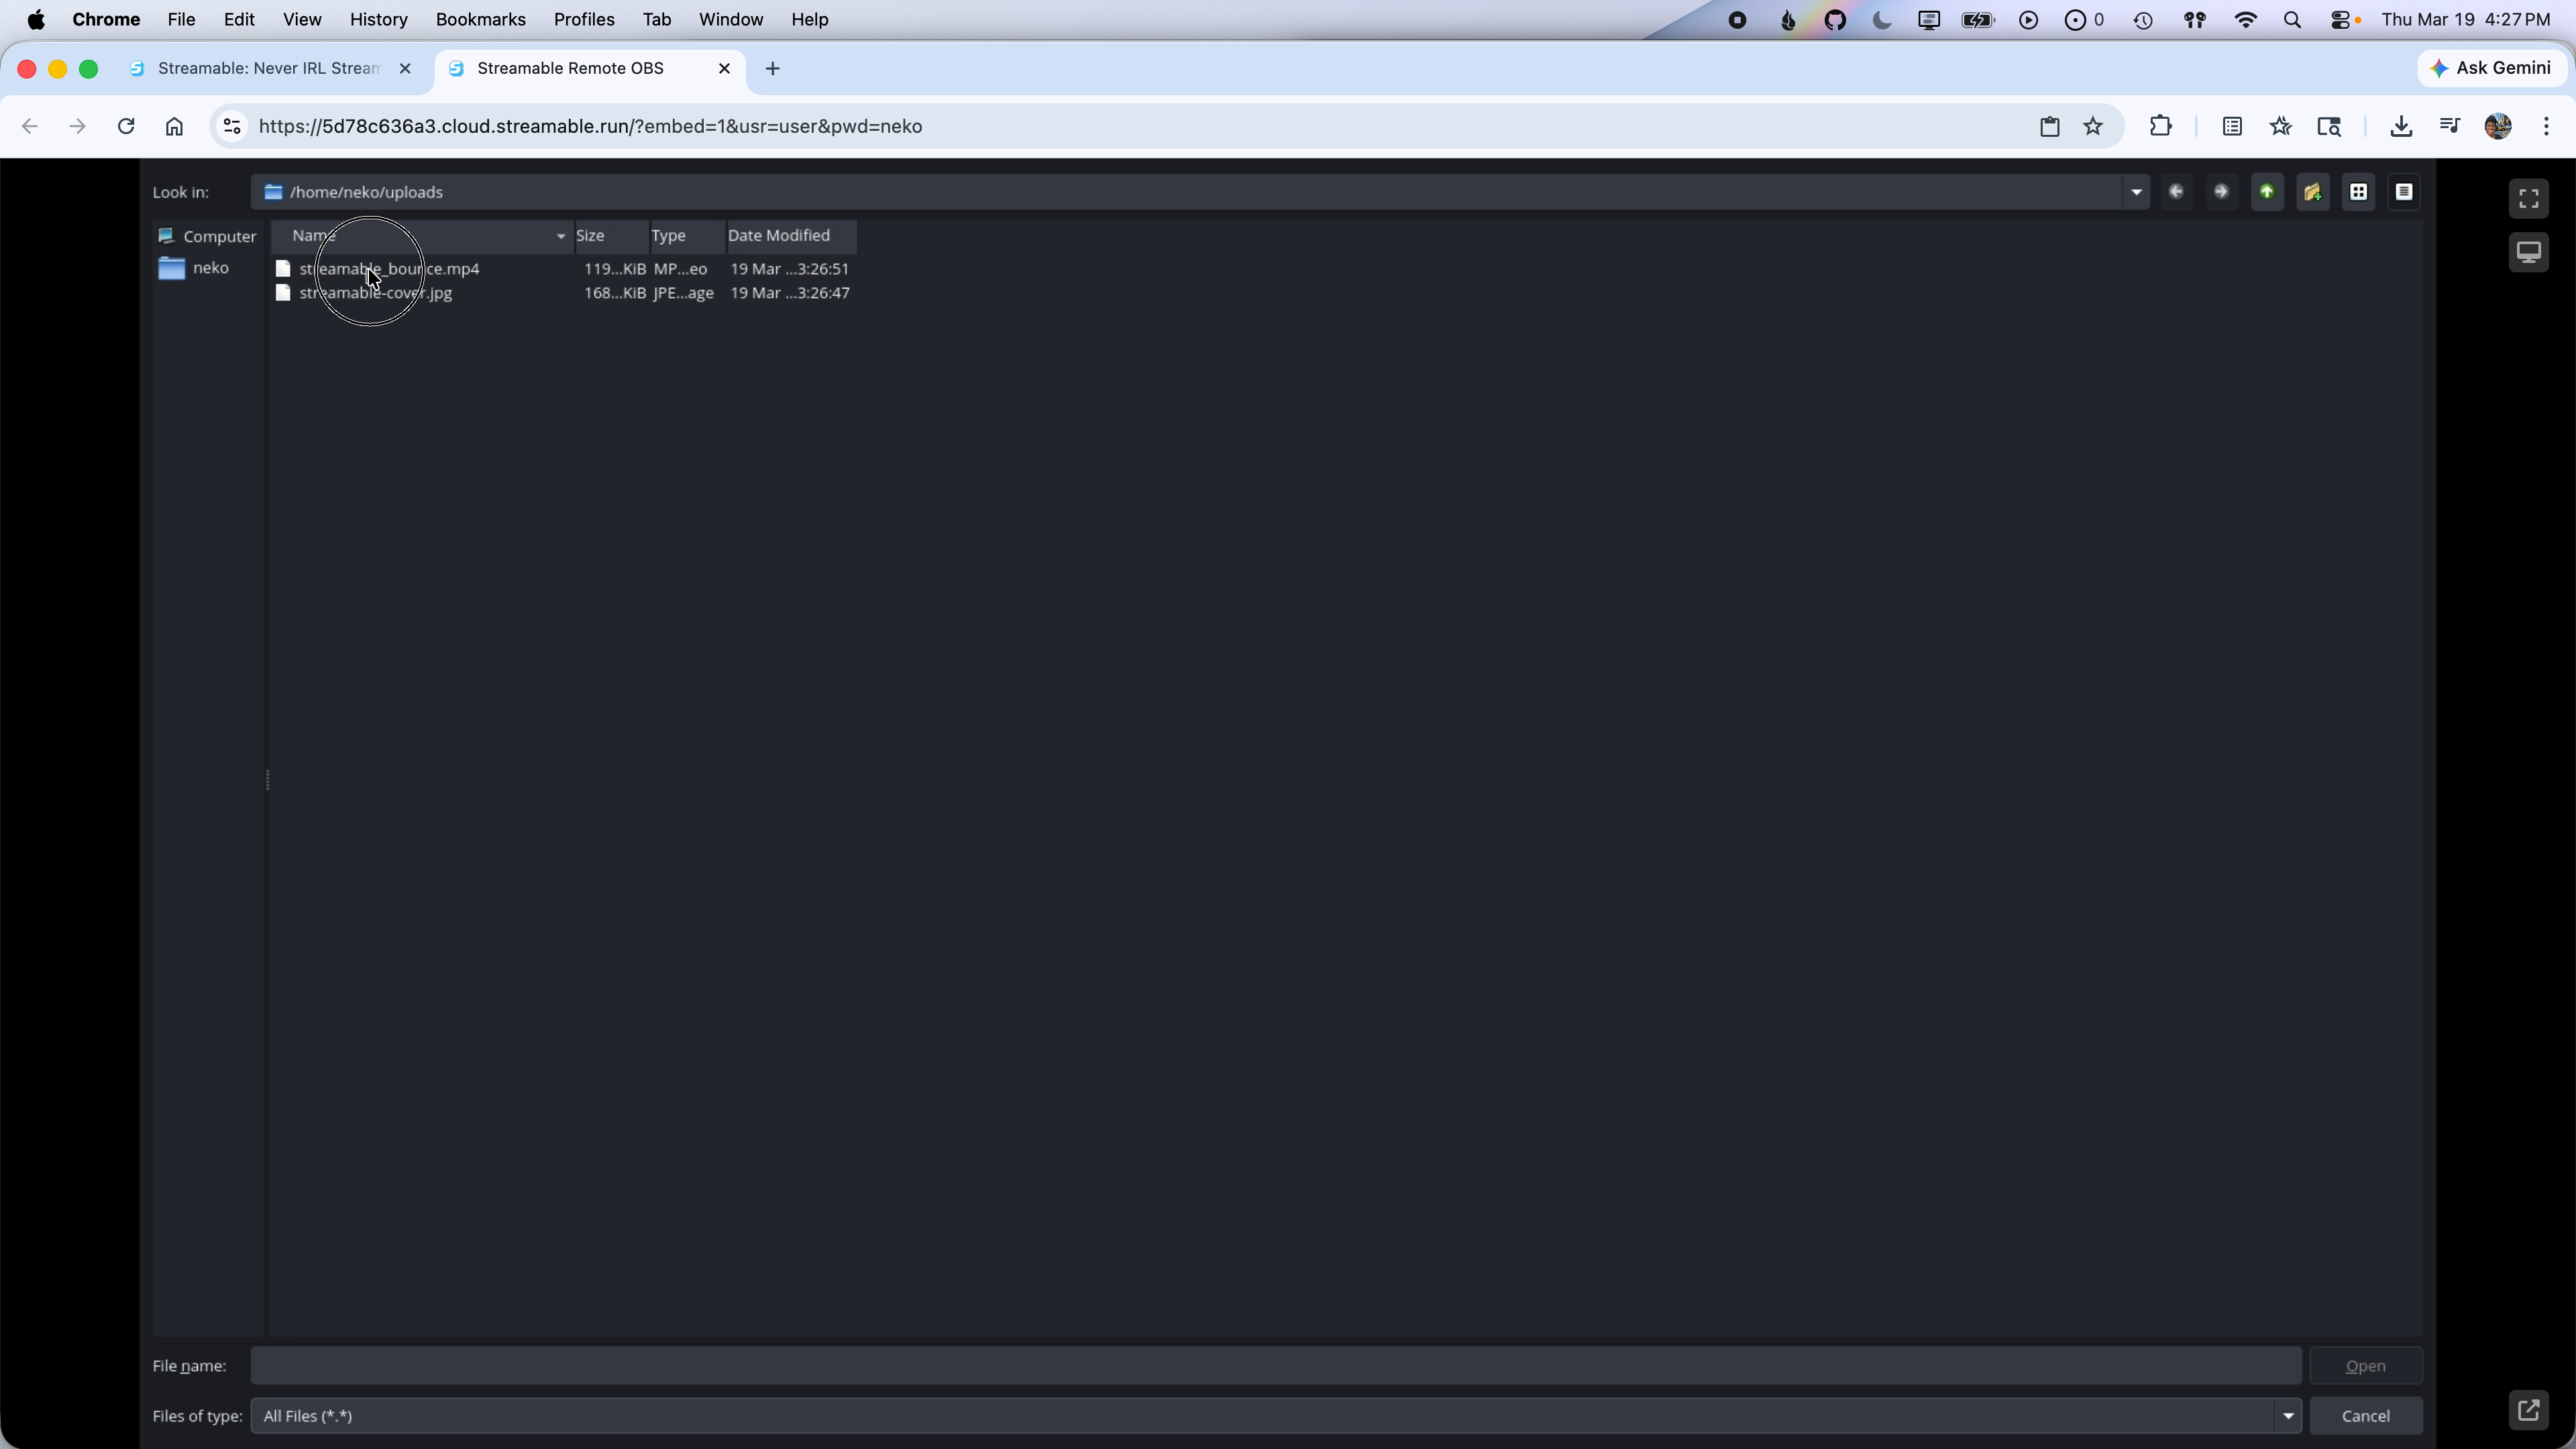
To add an image, click the + icon in the Sources panel, select Image, name your source, and click OK. In the properties window, click Browse and navigate to /home/neko/uploads to find your uploaded image.
To add a video, click the + icon in the Sources panel, select Media Source, name it, and click OK. Click Browse in the properties window and navigate to the same /home/neko/uploads folder. If you don't see your video, change the file type filter to All Files (.).
Step 5:Adjust Your Sources
You can now resize and reposition your new image and video sources within your OBS scene to get the perfect look for your stream!